Install applications on Guadalinex v9
When installing Guadalinex v9 there are a number of applications that will now be directly available to use without needing to do anything else. If you need others that are not included in the initial installation, no problem, you can add them to your system at any time.
When installing a new application on Guadalinex and in general in Linux, there can be four cases
- that the application you need is in the software repositories of Guadalinex
- that is in a specific repository outside of those of Guadalinex
- have the developer provide you with a DEB package (the system used by Debian and its derivatives)
- to provide you with the source code so you can compile it yourself
These four situations are ordered starting with the simplest and ending with the most cumbersome and also starting with the most probable and ending with the least frequent; so by far the most likely installation method will be the simplest.
Install from the Guadalinex repositories
Software repositories are the precursors of modern software stores that you will surely use, for example, to install applications on your mobile phone. You may be surprised to know that this invention has been around for a long time.
The software from the repositories can be installed very easily with a command from the console or, if you don't like the terminal very much, from a graphical application that will also help you explore the available packages.
To install a package from the command line just type sudo apt-get install program, with "program" being the name of the package. It is not essential but it is a good idea to start by updating the package list with sudo apt-get update. The command sudo that precedes the commands is used to execute them with administrator privileges so, at least the first time, it will ask you to write your password and logically your user must be in the administrators group. While updating it will show the progress, in the screenshot below it appears dimmed and summarized to focus on what is important.

If the package you install depends on others, it will inform you and ask you for confirmation to install them. To install everything you must click on the S key (which, as it is chosen by default, can be replaced by the Enter key) or if what it offers does not suit you, you can click on the N key and cancel the operation. In the screenshot below, which is also greyed out, it offers to install some packages in addition to Arduino, which is the one we have requested, and suggests and recommends others. It also informs you that you will need to use a certain amount of disk space to complete the operation.

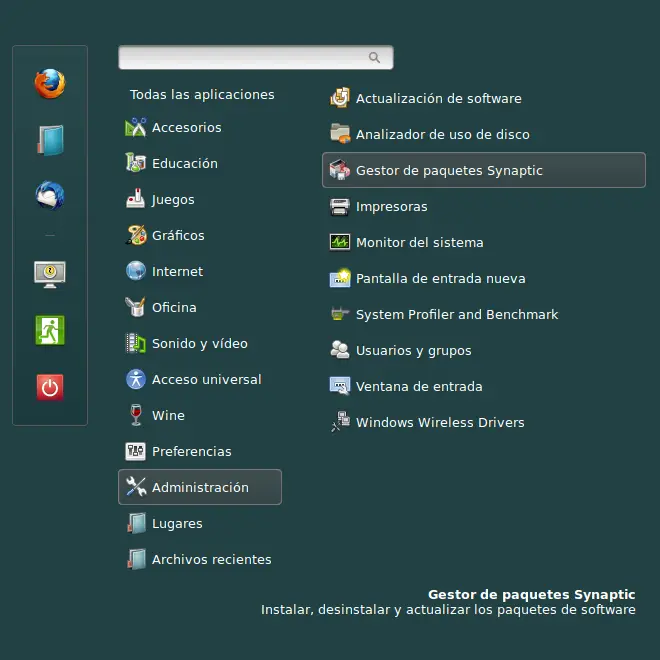
In case you prefer something more graphic, Guadalinex v9 uses Synaptic As a package manager, in my opinion, an excellent decision. To launch it you must choose it from the Administration entry in the main menu if you use the "standard" version or from Preferences if you use the "lite" version.


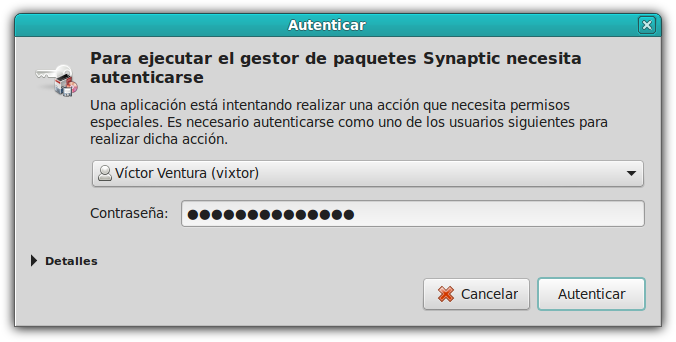
As it requires administrator privileges, it will ask you for the password before running the application. If your user is not in the administrators group you will surely know the password of someone else who is (working normally with an unprivileged user is not nonsense, it adds another layer of security) The box containing the user's name is a menu drop-down menu from which you can choose the privileged user and then write their password in the box below.
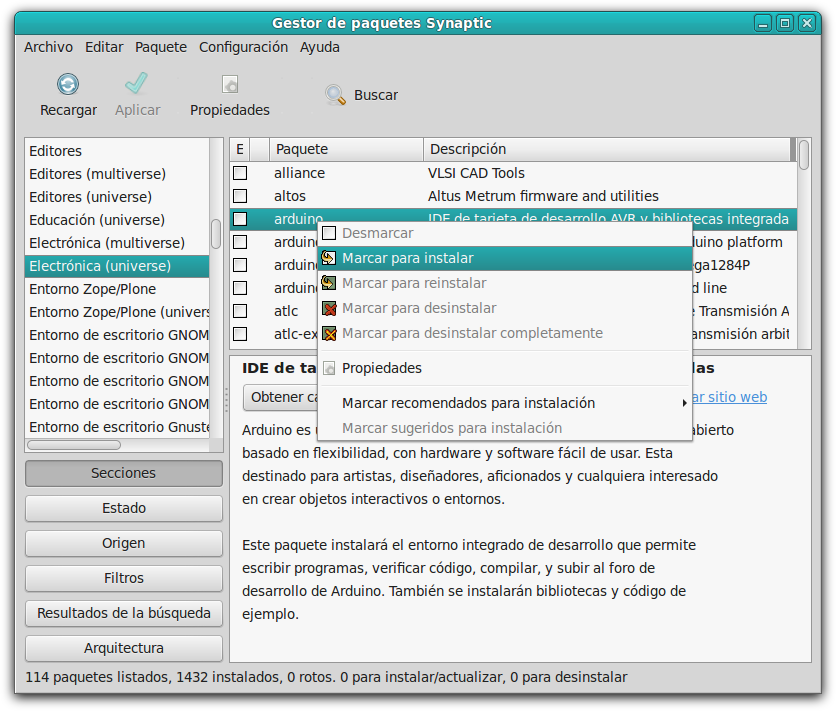
The number of programs included in the Guadalinex repositories is quite large, so to find the one you are looking for you can explore a section by clicking on the corresponding button in the lower left box and then on its name in the upper left and obtain information about it by selecting it from the right.
In the example in the screenshot below we have selected the electronics section of the “universe” repositories (free software) and from it we have chosen Arduino, whose description is shown in the lower right box.

In the box containing the package description there are three buttons. The first, the one furthest to the left, serves to show a screenshot of the application. With the central one you can see a report of the changes that the package has undergone since we installed it (if applicable) and with the last one you can visit the application's website.

You can also find it using the search engine and writing some text contained in the name or description of the package. The box on the left will change to search result mode where a list of the latest searches appears. The packages found with the search conditions will appear in the box on the right.

Once we have found the package (or packages) that we want to install, all we have to do is select it with the context menu button of the mouse (normally the right one, unless you are left-handed) and choose to mark to install. This operation can be repeated for as many programs as necessary and when finished the installation is executed by clicking on the "Apply" button.
As explained with the order apt get install, if it were necessary to install other packages on which the one we selected depended, an information box would be displayed with the requirements and authorization would be requested before marking them.

It has already been said that after this, clicking on apply will install the marked packages, so we already know how to install applications that are in the repositories, now we are going to see how add new repositories to install other programs that are not among those provided by Guadalinex. Of course, you will need the developer to provide you with the information on these repositories.
Install from a repository not included in Guadalinex
Suppose I want to install the magnificent circuit simulator whats up. First of all, as already said, I would look into Synaptic, our package manager, to see if it is available in the repositories we Guadalinex have configured.

No package with that name appears. Logically, I have made sure that it is written correctly and that it is what I am really looking for so I assume that it is not in the repositories.

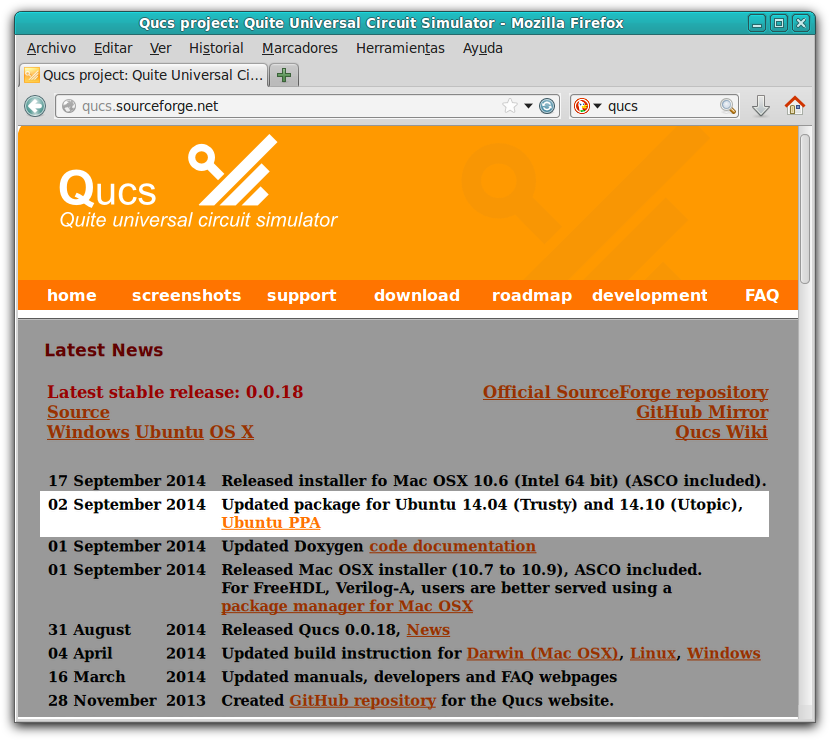
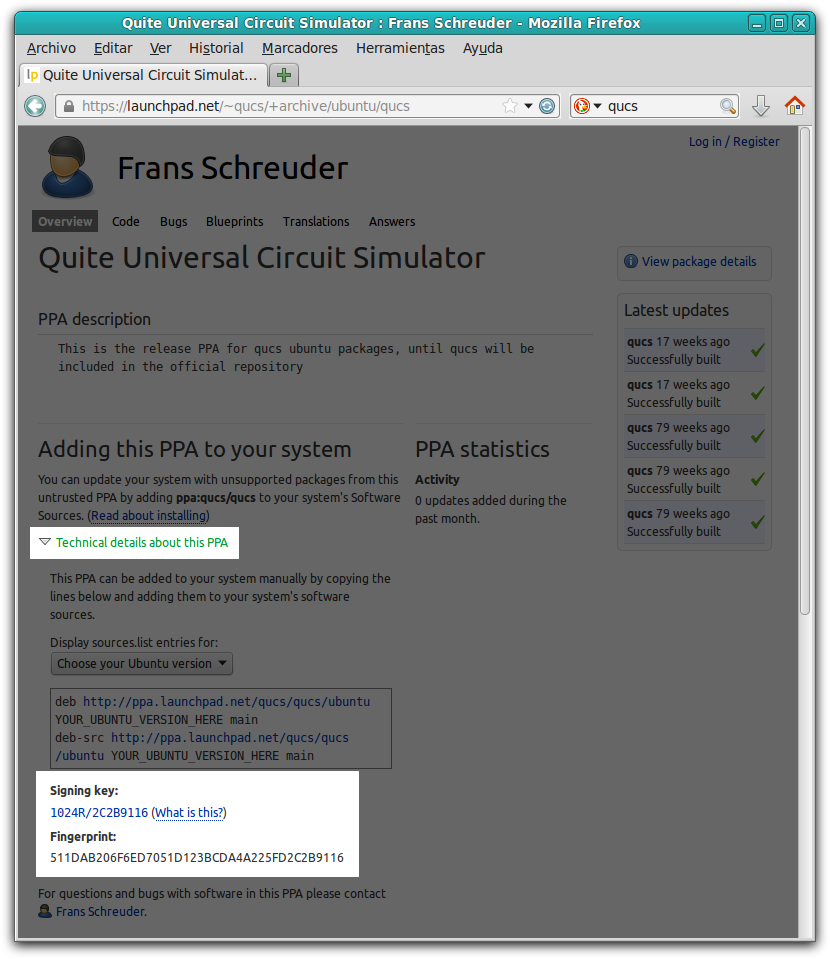
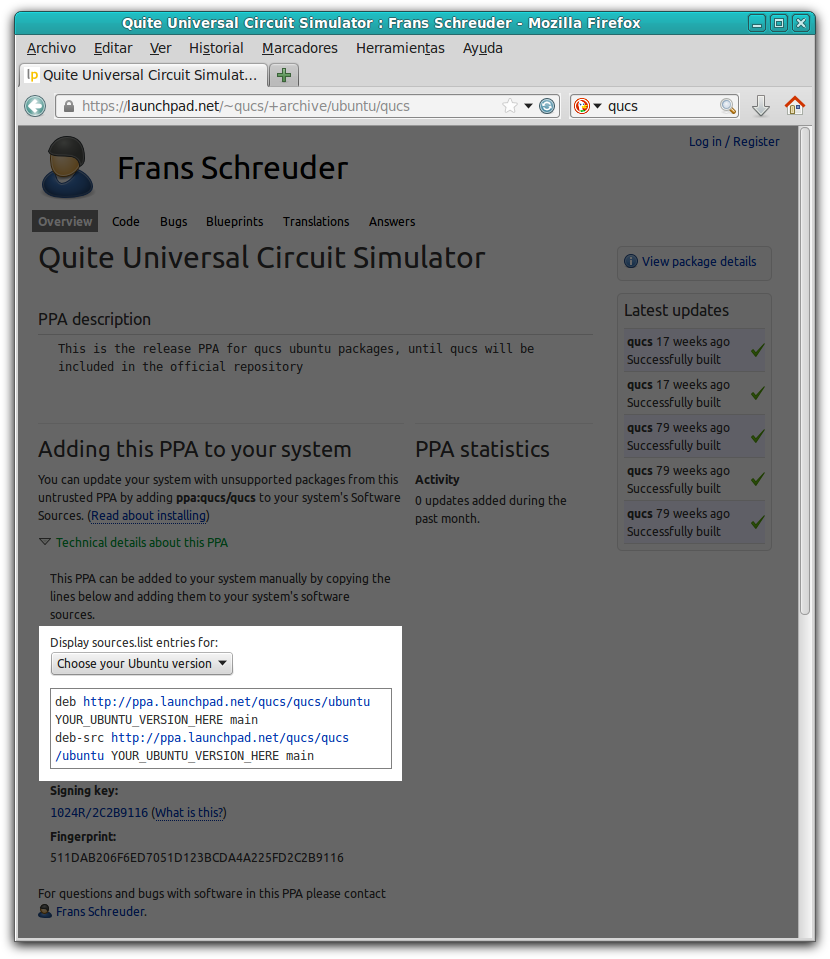
The next thing will be to get the necessary information to add the repositories that contain the program I need to my configuration. In my example, I have searched whats up on the Internet and I have found on their website, among other information, what I highlight in the following screenshot: a link to the PPA (Personal Package Archive, Personal Package Archive in Spanish)) of the application packages .
In the same link it also explains how to do it from the console. Since it is very simple, let's look at it before detailing how to do it in Synaptic. Obviously you don't need to do more than one of two things: either from the console or from the package manager.
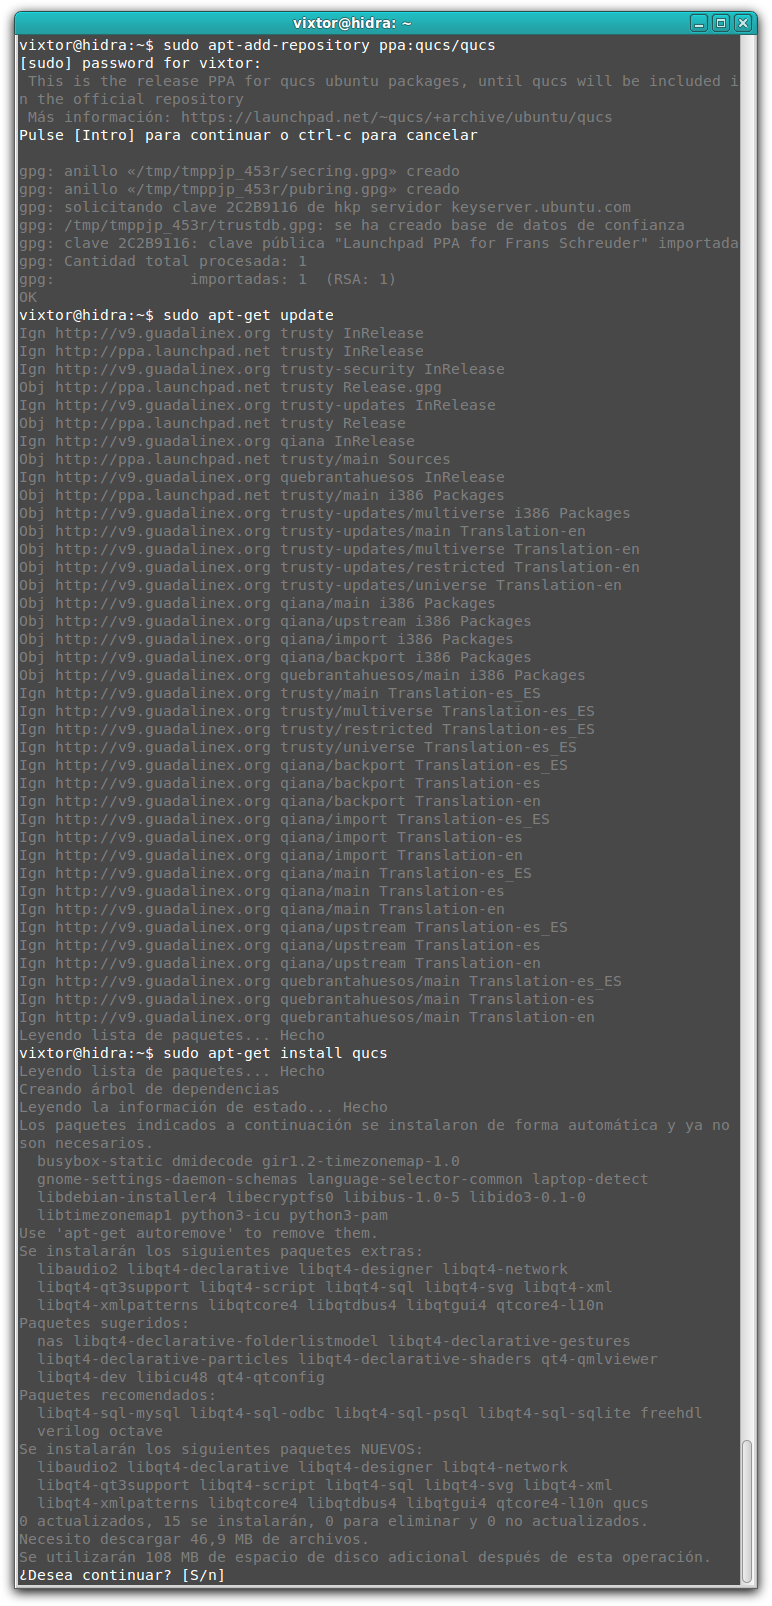
To add the repository from the console, use the sudo command apt-add-repository ppa:qucs/qucs which will also be in charge of searching for the public key so that the developer's identity cannot be impersonated and different software installed. Once added it will be necessary to update the repositories with the order sudo apt-get update. And already, to install the package (and its dependencies) it would be enough to use the command sudo apt-get install qucs. As we have already explained, it will be necessary to accept the installation of the additional packages on which ours depends and since administrative privileges are necessary, it will ask for the password at least the first time.
As with other console sessions, in the screenshot below, I've grayed out the messages and summarized the less significant ones to highlight what's most important to you: the commands and warnings waiting for a response. Once the process is completed, the program will be installed on our system and ready to use.
As you have seen, with the terminal it is quite fast and very simple. We are now going to explain how to do it from Synaptic. Basically you have to add the new repository and, for security, the public key that signs it (to prevent it from being impersonated). We can start by searching for the key and thus we do the rest of the process from the package manager.
On the project website whats up we had found information about the PPA that leads us to the packages website. In the following screenshot I have highlighted the link to find the key. You must display the technical information of the PPA and click on it (Signing key)
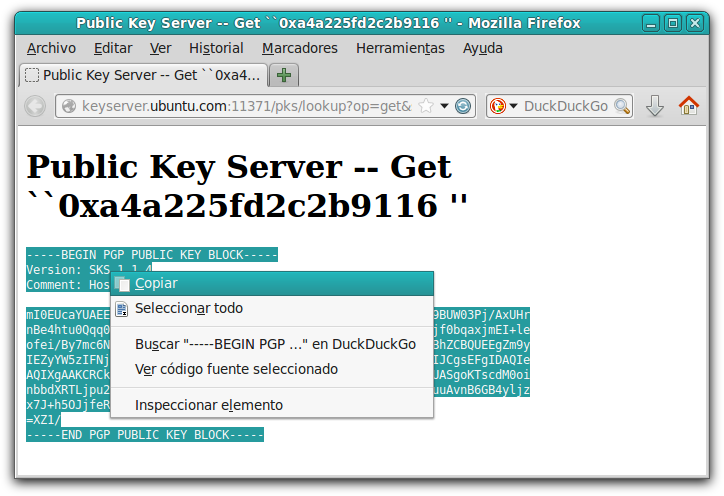
By clicking on the key, the browser will take you to the search page for the Ubuntu keyserver. In our case there is only one, we click on it and we already have the text of the public key; It is that text that is included between the lines BEGIN PGP PUBLIC KEY BLOCK and END PGP PUBLIC KEY BLOCK.

To use the key in the package manager you must copy it (also the lines that enclose it) and save it in a plain text document (that is, with a text editor such as Gedit, not with a word processor like the one in LibreOffice) Remember the name and location of the document for when the package manager asks.
we had searched whats up in our package manager and it did not appear, now we are going to add the new repository that contains it using, to do so, the "Repositories" entry in the "Settings" menu.

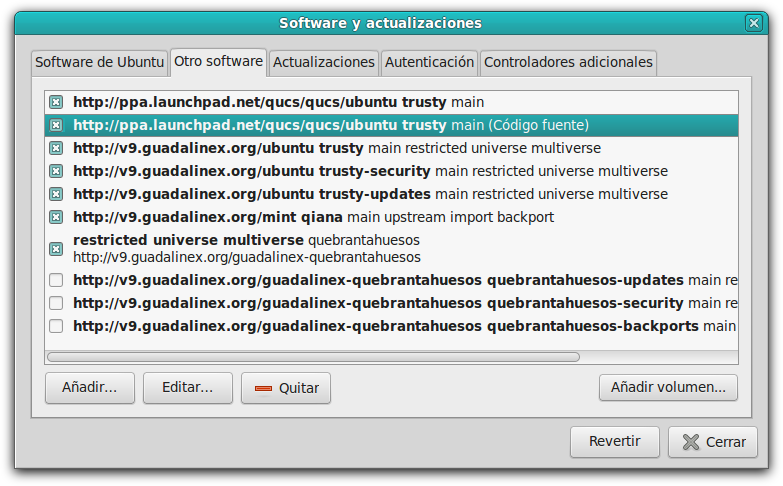
When you enter the settings, a dialog box will appear. In the "Other software" tab you can see a list of currently available repositories and with the "Add" button you can specify a new one.

In the dialog box that appears, we write the address of the PPA that we have obtained from the web page that we previously showed. It is important to note that you must specify the version of Ubuntu that is going to be used. In our case, as we explained in the article We already have Guadalinex v9, it derivates from Ubuntu TrustyTahr so we will have to write trusty to determine the repository used.
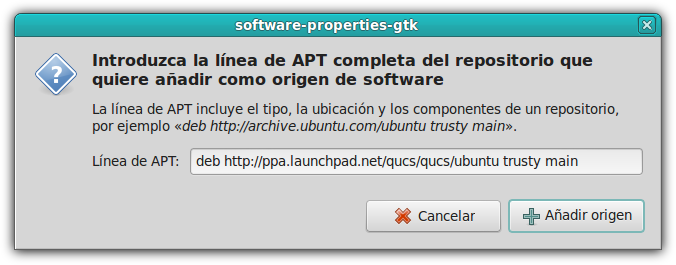
Let's go back to the Qucs PPA website to explain where this came from. deb http://ppa.launchpad.net/qucs/ubuntu trusty main. In the following screenshot the area that contains the information that interests us now has been highlighted.
Once the new repository is added, it appears in the previous list. By the way, the source code repository also appears in addition to the one that contains the binary packages (already compiled) that we have specified.
Before installing the packages from the new repository we need to be able to verify them with their key. This is why we copy it from the web and save it in a text document. In the "Authentication" tab we can load it with the "Import key" button that will ask us for the location of the document that contains it (the one we recorded before)

If everything goes well, after choosing the document with the public key in the "Authentication" tab, a new block will appear that corresponds to the new repository.

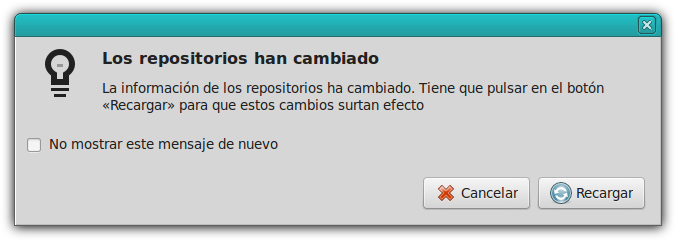
When closing the dialog box after having added the new repository and its corresponding key, the package manager warns that the repositories have changed but that the changes will not take effect until they are reloaded.
From the repositories update notice itself, they can be reloaded by pressing the corresponding button. It can also be done from the main interface of Synaptic using the "Reload" button located at the top left, under the menu.
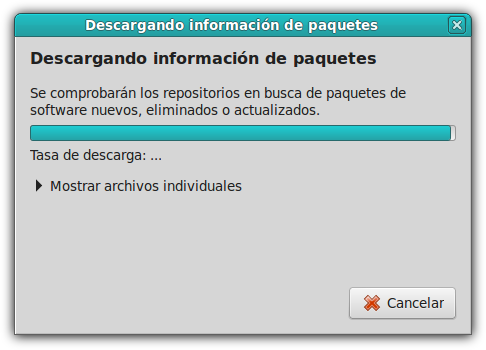
When we finished reloading the information from the repositories, the package we were looking for, whats up, is now available to install as explained above: select it with the context menu button, choosing "Mark to install" and clicking "Apply" when finishing selecting the packages to be installed.

Install from a DEB package
To do this operation very easily we can use the tool Gdebi which is used to install DEB packages from a graphical environment. With everything seen so far, you surely know how to find the package and mark it to install it.

By the way, when checking it it will be necessary to also select some packages that it uses. Some components of the interpreter Python and the core package of the program itself (gdebi-core)

If you need to install Healing, the laminating program ultimaker, as we already saw in the previous section, I would start by searching for it in the repositories, since it is not available I would try to search the Internet for repositories other than Guadalinex (and reliable) that contained it. In this case I have not found them, however I have found them on the website ultimaker a document with a .deb extension (a DEB package) that contains it.
It is important that you choose the package that corresponds to the platform architecture of your system. In our case i386, which is the 32-bit version of Guadalinex.


Once the package has been downloaded (from the website ultimaker) we open it with our newly installed Gdebi. As you probably do not have another application installed to manage DEB packages, just double click on the document icon (normally it will have ended up in the "Downloads" folder of your personal folder). But if there is another default application, sometimes it happens with applications To compress documents, you must select it with the mouse context menu button and open it expressly with Gdebi.

Gdebi is warning that it will be necessary to install 8 additional packages in order to install the package that contains Healing. Clicking on the "Details" button will show a list with the packages that specifically need to be installed.

When you click on "Install package" it will ask for the password (remember that installing applications requires administrator privileges). If, as in our case, other packages (dependencies) are needed, it will download them and install them automatically along with the programs that our package contains.


And voila, it is now available to use. All that remains is to close the dialog boxes. You will surely have noticed that it is possible, by selecting the corresponding box, to automatically close these dialog boxes if there is no warning message about something that has gone wrong or that requires your attention.

When the installation is finished, it returns to the initial dialog box but this time, in the "Status" box it reports that the package is already installed and offers to uninstall or reinstall it using the corresponding buttons for each operation: "Reinstall package" and "Uninstall package ».
After seeing this third method, installing from a DEB package, it may seem that it is easier than the second, installing from a repository not included in Guadalinex, and it is assumed that they were ordered according to difficulty. In the long run it is not like that; using repositories has some advantages over just installing a package; On the one hand, they can contain several related packages that resolve dependencies more efficiently and on the other hand, once the repository is incorporated into the package system, it will be much easier, if not automatic, to update the applications to correct errors or incorporate new features. It is also possible to create repositories that group applications of some type (electronics, multimedia, 3D printing...) and that are more frequently updated than the official branch, compiled for alternative platforms (such as ARM processors) customized according to some corporate or technical criteria.
Compile the program source code
Compiling is a term used to refer to the process of building an application for use on a specific system based on a specific platform. The compilation or construction process, as it is also frequently called, allows obtaining executable, binary documents (machine code) from the source code. The above is subject to many nuances, for example, in Java byte-code is executed, which would be something like machine code for a virtual machine (a software machine, not a physical one). There are also many applications that are written in interpreted languages (such as Python) although it is also possible for object code to be automatically created on the fly. There is also no reason not to mix all of the above and, for example, make the parts of the application that perform more intensive calculation tasks in a compiled language and the user interface in an interpreted language.
All of the above should suggest that there are too many possible ways to build an application to be able to speak of a completely standard method and that it is very likely that you will have to consult the information that the author provides to build the program, which will surely be accompanied by a construction and/or installation script (a program, literally a script).
With the previous caveats noted, we are going to see the process, as standard as possible, of building an application from its source code. Broadly speaking and trying to be generic, these are the steps to take:
- Download source code
- Unzip it (if applicable)
- Set the default directory (to make it more convenient)
- Setup
- Compile
- Install (or copy by hand, where appropriate, the build result)
There are mainly two alternatives download source code: that the author offers it, usually compressed, on a web page or, much more common today, that he uses a version control system (VCS) that includes a repository. Although there are some more, such as mercurial o Bazaar, the most used VCS lately are Subversion (also known as SVN) and increasingly GIT. It is possible that the author provides links to download the application documents on the version control server itself, but the most optimal thing, for example to maintain an update, is to use the specific tools that are available in the repositories of Guadalinex.
From what has been said, it is logical to think that each application will need the tools specific to the language used in addition to the generic ones that may apply. It is very likely that you need to install the g++ compiler, which in turn depends on gcc which depends on cpp and the tools make, automake, autoconf, autoreconf... which are not in the base installation although the good news is that they are in the repositories of Guadalinex so you already know how to install them.


Now that we have installed the tools, we are going to test them with a couple of applications, for example, to download NVC (a VHDL compiler and simulator) we use the command git clone https://github.com/nickg/nvc.git

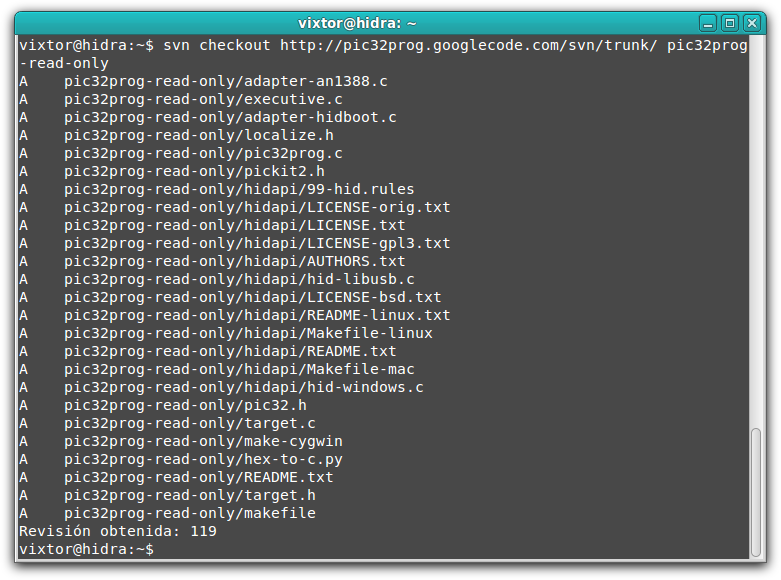
Now we are going to use svn to download PIC32Prog, an application for programming 32-bit PIC microcontrollers using, among others, a PICKit2 programmer. The order that is responsible for doing this is svn checkout http://pic32prog.googlecode.com/svn/trunk/pic32prog-read-only Don't worry about read-only, what it means is that if you are not registered you will not be able to send the changes you make to the program to the repository, but the program will be fully functional and of course you will be able to modify it on your computer. As usual I have summarized the messages.
If this were the case (it is not in the previous examples) now it would be time to decompress. You can do it with your favorite graphical tool, probably with the file manager, which is installed with Guadalinex, or since we have the console at hand, you can use one of the following methods:
- If it is a document in format ZIP with the order unzip the downloaded application
- If it is in format TGZ o TAR.GZ with the order tar -zxvf thedownloadedapplication
- If the document format is BZ2 with the order tar -jxvf thedownloadedapplication
The next step, something quite minor but useful, is change directory (folder) to the one containing the application we are building (compiling). It is quite simple, being nvc the new application folder, just use the command cd nvc. If you have been changing folders for other operations it may be necessary to use the full folder path for example cd /home/vixtor/nvc or if it's inside your personal folder you can save some keystrokes with cd ~/nvc. In our previous examples it would look like the screenshots below show.


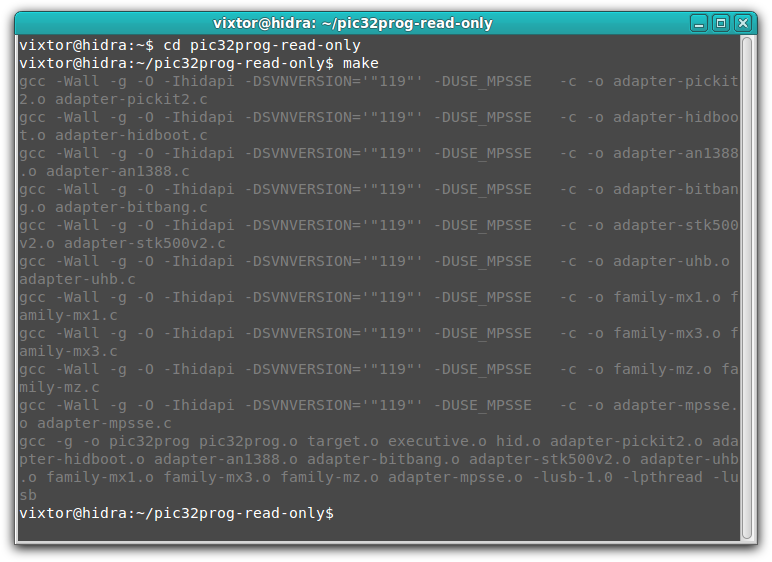
The next step is configuration. Normally it will be enough to use the command ./configure But as has been said before more times, it is important to consult what the author documents in this regard. In our examples, pic32prog requires no configuration (no need to use ./configure) while nvc needs to execute the commands first ./autogen.sh y ./tools/fetch-ieee.sh and create the folder build from which the configuration is executed with the command ../configure
Once the application is configured, the command is used make to build it. If applicable, it may also be necessary to use make install to record everything in place after the executable code is generated. Many times it can be used make clean to leave everything clean, for example to recompile from scratch if changes are made.
In addition to the tools to build the application from the source code, the application may need other components to function, frequently libraries, and therefore for its construction. In our examples, pic32prog needs the libraries to manage the USB port, into which the programmer (PICKit or other) will be connected, and nvc needs TCL, Flex and LLVM, which must be available before building the application.
As you will see, there are many factors that influence the process of building the application, so it is necessary to finish with what was said at the beginning: it is very important to consult the documentation provided by the author about the method and requirements for building the application. application since it is very difficult to offer a generic procedure beyond the mantra download, unzip, configure, build, install and clean.


Post Comment