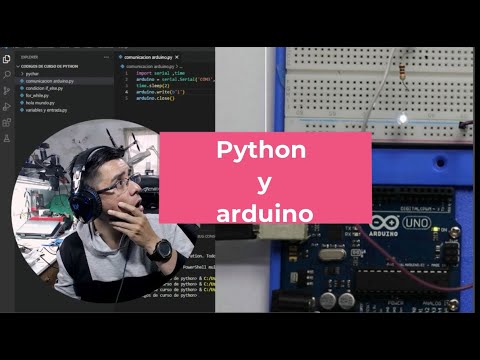
Complete guide to setting up serial communications between Python and Arduino
Welcome to Polaridades, the blog where we explore the extremes of each topic. On this occasion, we bring you a complete guide to configure serial communications between Python and Arduino. If you are passionate about programming and electronics, this information will be very useful to you. We will teach you step by step how to establish a fluid and efficient connection between both devices, opening the doors to endless creative possibilities. Are you ready to dive into the fascinating world of Python and Arduino communication? Keep reading and find out!
Control your devices from Python with Pyserial
In the era of automation and interconnectivity, controlling devices from Python has become an essential tool for many developers. Thanks to the Pyserial library, it is possible to establish serial communication with different devices and control them in a simple and efficient way.
Pyserial is a Python library that provides an interface for serial communication. Allows you to establish connections with devices that use serial ports, such as Arduino, Raspberry Pi, GSM modems, printers, among others. With Pyserial, it is possible to send and receive data through these devices, opening up a world of possibilities in terms of control and automation.
Installing Pyserial is very simple. Simply use the Python package manager, pip, to install it in our development environment. Once installed, we can import the library into our programs and start using its functions and methods.
To establish a serial connection with a device, we must specify the port to which it is connected. We can get a list of available ports on our system using the `serial.tools.list_ports.comports()` function. Once we have the port identified, we can create an object of the `Serial` class and establish the connection.
Once we have established the serial connection, we can send and receive data using the methods provided by Pyserial. For example, to send data, we can use the `write()` method. If we want to receive data, we can use the `read()` method. These methods allow us to interact with the device bidirectionally, giving us complete control over it.
In addition to sending and receiving data, Pyserial also provides additional functionality such as configuring communication parameters such as baud rate, number of data bits, parity, and more. These parameters can be set using methods such as `baudrate()`, `bytesize()`, `parity()`, among others.
Serial Communication Between Python and Arduino: Example and Step-by-Step Guide
In this article we will teach you how to establish serial communication between Python and Arduino. Serial communication is a way of transmitting data serially, that is, sequentially, bit by bit. It is a very common way to exchange information between different devices, and in this case, it will allow us to send and receive data between our computer and our Arduino board.
To begin, we will need to have Python and the Arduino IDE installed on our computer. If you don't have them yet, you can download them from their respective official websites.
Once we have everything configured, the first step will be to connect our Arduino to the computer using a USB cable. Make sure the board is properly connected and powered on.
Configuration in Python
In Python, we will use the PySerial module to establish serial communication with Arduino. If you don't have it installed, you can easily do it by running the following command in the terminal:
"python
pip install pyserial
"`
Once we have PySerial installed, we will import the module into our Python script:
"python
serial import
"`
Next, we will need to know the serial port to which our Arduino is connected. We can do this by executing the following code:
"python
import serial.tools.list_ports
ports = serial.tools.list_ports.comports()
for port, desc, hwid in sorted(ports):
print(f»Port: {port}»)
"`
This code will show us a list of the serial ports available on our computer. Identify which port your Arduino is connected to and write it down, we will need it later.
Once we have the port identified, we can open serial communication using the following code:
"python
ser = serial.Serial('COMX', 9600) # Replace COMX with the corresponding port
"`
Here, 'COMX' represents the serial port to which our Arduino is connected. Make sure you replace 'COMX' with the correct port.
Configuration on Arduino
On the Arduino side, we will need to write some simple code that allows us to send and receive data via serial communication. Here is a basic example:
«`arduino
void setup () {
Serial.begin(9600); // Communication speed
}
void loop () {
if (Serial.available ()) {
char data = Serial.read();
Serial.print(«Received: «);
Serial.println (data);
}
delay (1000);
Serial.
Transferring information from Arduino to Python: Step by step guide
In this step-by-step guide, we will learn how to transfer information from Arduino to Python easily and efficiently. This data transfer is essential for those who want to use Arduino to collect information from sensors and then process and analyze it in Python.
To get started, you'll need to have Python installed on your computer. You can download it from its official website and follow the installation instructions. Once you've installed Python, we're ready to get started.
Step 1: Physical connection
The first step is to establish a physical connection between the Arduino and your computer. To do this, you will need a USB cable to connect the Arduino's USB port to an available USB port on your computer.
Step 2: Arduino Setup
Once you've connected the Arduino to your computer, you'll need to configure the Arduino IDE so it can communicate with Python. Open the Arduino IDE and select the correct board and port from the “Tools” menu options.
Step 3: Code on Arduino
Now, you will need to write some code in Arduino that reads the data from your sensors and sends it to Python through the serial port. You can use the Serial.begin() and Serial.print() functions for this. Make sure the serial port baud rate in the Arduino code matches the baud rate in the Python code.
Step 4: Code in Python
Once you have set up the Arduino, it is time to write the code in Python that will receive the data sent by the Arduino. You can use the PySerial library for this. Import the library and then instantiate the Serial object with the correct port and baud rate. Then, you can read the data from Arduino using the read() function and process it according to your needs.
Step 5: Data processing and analysis
Once you have received the data from Arduino in Python, you can process and analyze it according to your needs. You can use libraries such as NumPy and Pandas to perform mathematical calculations and analysis, and matplotlib to visualize the data in the form of graphs or diagrams.
And so, dear readers, we come to the end of this complete guide to setting up serial communications between Python and Arduino. I hope you haven't gotten caught in an infinite loop of wires and codes!
Now that you have the power to connect these two worlds, the possibilities are endless! You can make your Arduino dance to the rhythm of your favorite songs, or even turn on the fan when the ambient temperature rises as if you were at a rock concert.
Always remember to have your reference manual on hand, since in this world of programming you never know when you will encounter an error or bug. But don't worry, mistakes are just opportunities to learn and improve!
So go ahead, dare to explore the fascinating world of serial communications between Python and Arduino. And remember, if you find yourself at a dead end, you can always rely on the community of developers willing to help you online.
See you in the next article, where we'll explore more technological polarities and help you maintain balance in your geek world! Until then, keep programming with passion and good humor!
Post Comment